
|
Changing your DNS settings
Update your DNS records, nameservers or URL forwarding yourself in the Domain Manager, ask your Personal Assistant, or let us do it for you.
|
| Important: these changes assume that you are using our nameservers (see your registration email for details). If you are using third-party nameservers, you need to contact the owner of the nameservers to make changes to your DNS settings. For further details about how nameservers and DNS settings work, see this article. |
Choose how you'd like to make changes
|
Easiest
Ask your Personal AssistantTell it the change in your own words — it makes it for you and confirms anything that could affect your email or website. |
Do it yourself
Domain ManagerEdit your DNS records, nameservers and URL forwarding directly, any time. |
Fully managed
We do it for youSend us a ticket with the changes you require and we'll make them for you. |
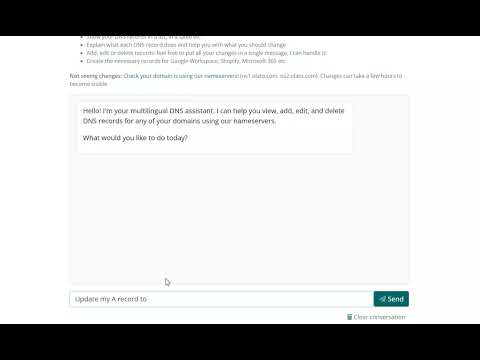
Using your Personal Assistant
- Log in and click your Personal Assistant (bottom right of any page).
- Tell it the change you want, in your own words — for example “Point www.mybusiness.nz to 203.0.113.20” or “Add the TXT record Google gave me for mybusiness.nz”.
- Check what it will change, then confirm.
|
Using the Domain Manager
Change DNS records
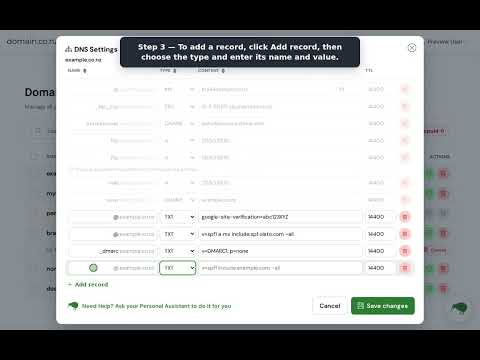
- Open the Domain Manager and click the DNS Settings icon next to your domain.
- To change a record, edit its value.
- To add a record, click Add record, then choose the type (A, AAAA, CNAME, MX, TXT, SRV or PTR) and enter its name and value.
- Click Save changes.
|
Change nameservers
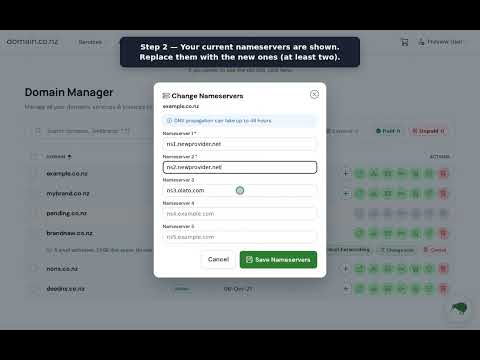
- Open the Domain Manager and click the Change Nameservers icon next to your domain.
- Your current nameservers are shown. Replace them with the new ones (at least two).
- Click Save Nameservers.
|
Set up URL forwarding
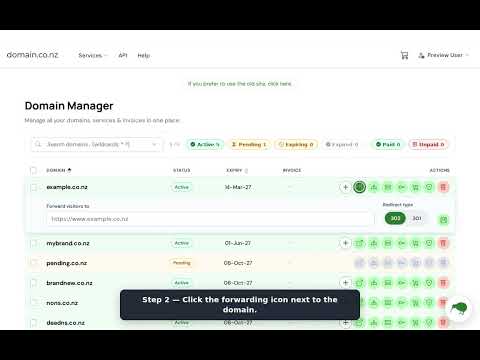
- Open the Domain Manager and find the domain you want to forward.
- Click the forwarding icon next to the domain.
- Enter the web address to send visitors to.
- Choose the redirect type: 302 (temporary) or 301 (permanent).
- Click Save forwarding.
|
Fully managed: we do it for you
Send us a ticket with the changes you require (text, not screenshots please!) — that's it! Here are examples of what you should include in the message.
| Please note: changes to nameservers and DNS settings take time to replicate across the internet. Usually you will see results in 2–3 hours, but it can take as long as 48 hours. |
|
Still need help?
If all else fails, Contact Us.
|